
Description
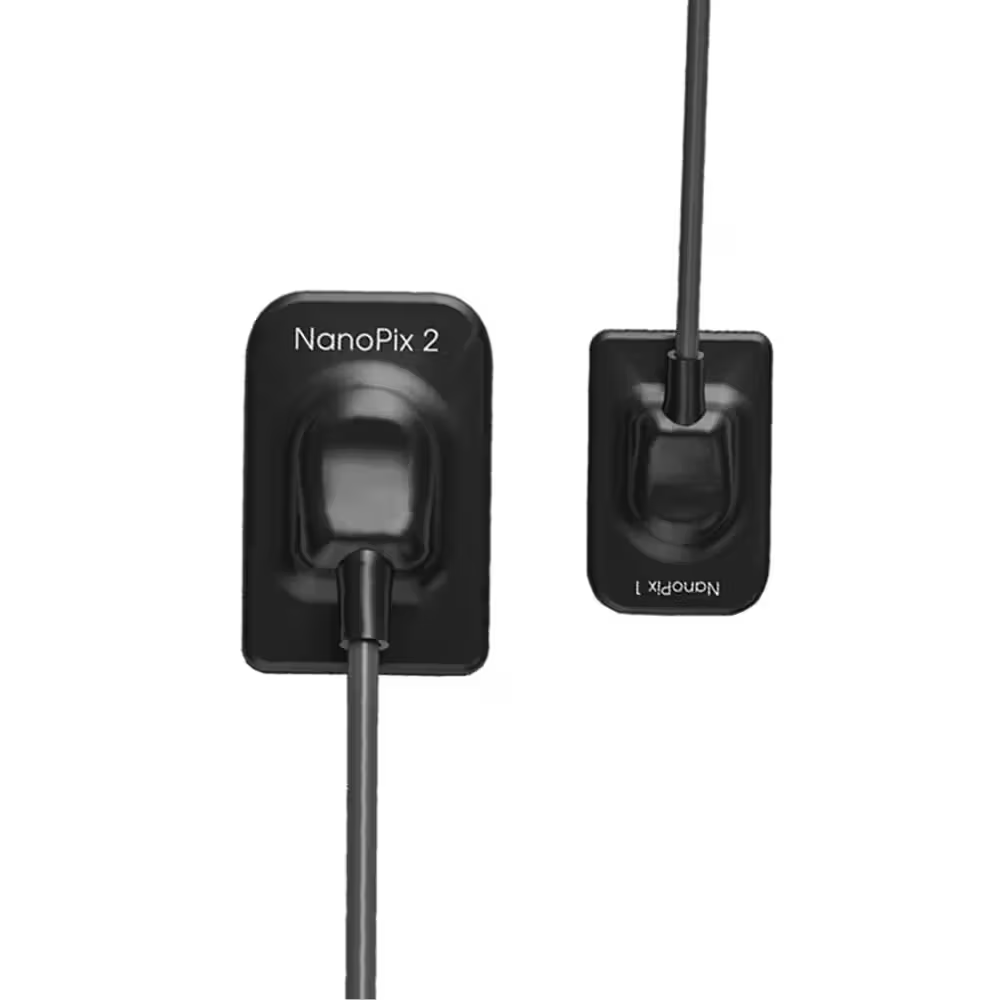
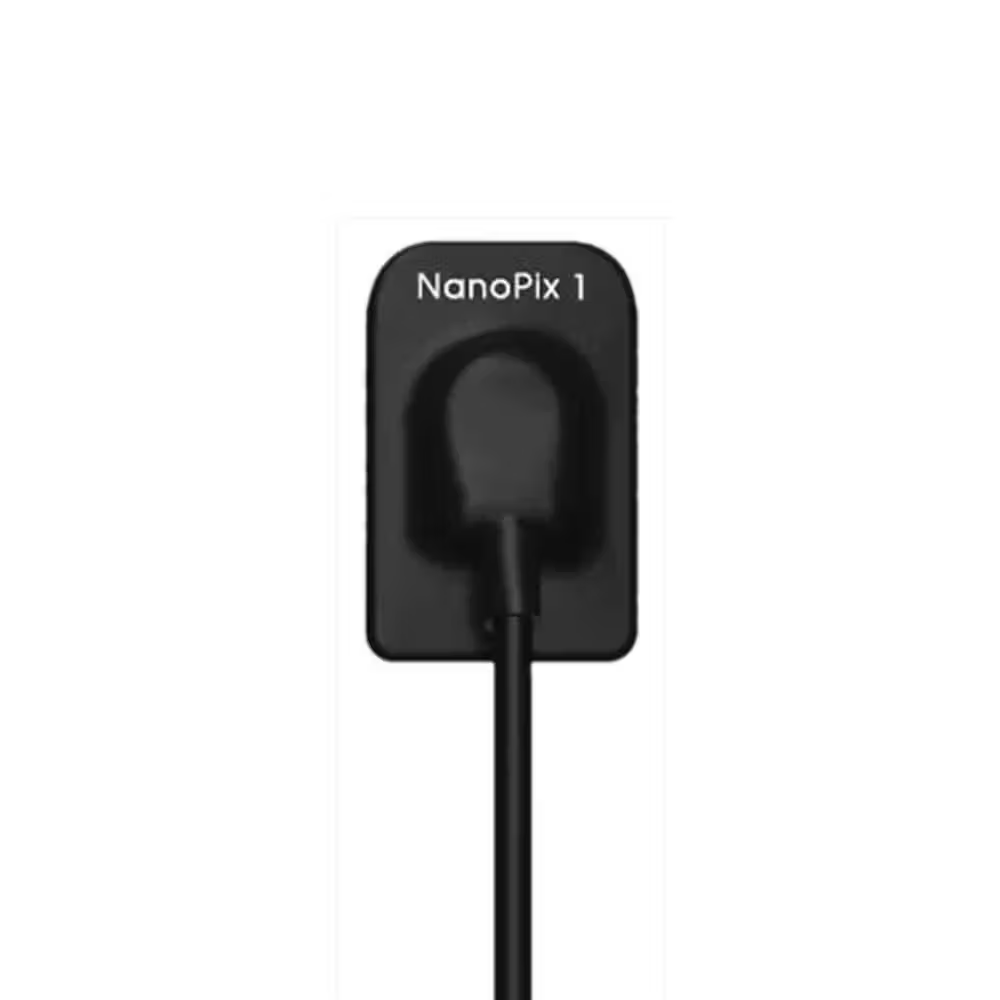
The Medicom Healthcare Dental RVG is a cutting-edge intraoral X-ray sensor known for its ergonomic design and 4.4mm thickness, making it the thinnest on the market. It features a cupped cable connection for comfortable finger positioning and durability. Utilizing AED technology, it automatically acquires digital images with compatible DC and AC X-ray generators. The APS CMOS technology, developed for aerospace, offers high signal-to-noise ratio, low power consumption, and long lifespan. The Nanopix reduces costs to 1/10th of film-based systems, with a fast 3-second imaging process. Equipped with smart, user-friendly software, it enables quicker image acquisition and high-quality results.
Key Features:
- Unique Design
a)Ergonomic design: Cupped cable connection ensures comfortable finger positioning
b)Robust cable connection
c)Ultra-thin body design: 4.4mm – The thinnest X-Ray sensor - AED Technology
a)From chest radiography
b)Compatible with almost all DC & AC X-Ray generators
c)Digital images come automatically when your X-Ray is switched on - APS CMOS Technology
a)From aerospace industry
b)High signal-to-noise ratio with maximum details
c)Long life and low power consumption - Direct Deposition CSI Technologya)From chest radiography
b)Low dose radiation for safety
c)Less exposure time but higher resolution - Smart Software
a)Easy to install
b)User-friendly interface
c)Faster image acquisition & better-quality images
Key Specification & Dimensions
| Specification | NanoPix 1 |
| Detector Technology | APS CMOS |
| Scintillator | CsI |
| Pixel Matrix | 1000 × 1500 |
| Theoretical Resolution | 25 lp/mm |
| True Resolution | 20 lp/mm |
| Active Area (mm) | 20 × 30 |
| Mechanical Size (mm) | 25.4 × 36.8 × 4.4 |
| AD Conversion | 16-bit |
| Data Interface | USB 2.0 |
| Protection Rating | IP68 |
Directions to use:
– Read the User Manual:
Carefully review the user manual provided by the manufacturer. It contains essential information on installation procedures and usage guidelines.
– System Requirements:
Ensure that your computer meets the hardware and software requirements specified by the manufacturer.
– Software Installation:
Insert the installation USB or download the software from the manufacturer’s website. Follow the on-screen instructions to install the imaging software.
– Driver Installation:
If required, install the necessary drivers to enable communication between the X-ray sensor and the computer.
– Connect the X-ray Sensor:
Connect the Nanopix Dental RVG to your computer using the provided USB cable.
– Calibration:
Perform any calibration procedures specified in the user manual to ensure accurate imaging.
– Power On the X-ray Generator:
Turn on the X-ray generator to initiate the digital image acquisition process.
– Finger Positioning:
Use the cupped cable connection to support comfortable finger positioning during the imaging procedure.
– Patient Positioning:
Place the X-ray sensor correctly in the patient’s mouth to capture the required diagnostic area.
– Capture Images:
Follow the software instructions to capture images. This may involve clicking a capture button or using a footswitch, depending on the setup.
– Review Images:
Evaluate the captured images on the software interface and verify image quality. Repeat exposure if necessary.
– Save and Manage Images:
Save the approved images to the designated folders and organize them within the software interface.
– Optional Preferences:
Explore and set any optional imaging preferences available in the software for customization.
– Shutdown Procedure:
Follow the manufacturer’s guidelines for properly shutting down the X-ray sensor and related software.
Warranty
1 Years